Introduction
In this article, we are going to learn about Google colaboratory notebooks in as much detail as possible. This tutorial is going to cover a variety of things related to Google colab, the details of which you can find in the Table of Contents Below.
- What Google colab offers
- How to setup Google colab
- Enabling GPU and some basic functions
- Importing files/datasets to Google colab notebook
If you have already used Google colab and know a few things feel free to skip any part that you’re already familiar with and jump right to the part you are interested in.
What Google Colab Offers
The reason why Google collab has become so popular nowadays is mainly because they offer free GPU for training for up to 12 hours continuously and even after that you can reconnect for a new session and the thing is that most people do not have a GPU in their workstation. Those who do – it’s not manufactured by Nvidia. The current GPU that collab offers is nvidia tesla T4.

How to setup Google Colab
- First of all you need a gmail account.
- Go to your google drive.
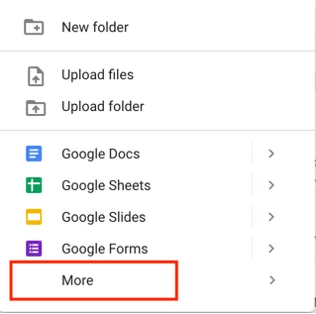
- Once you are there, right click, click on more, click on connect more apps.

4. Type colaboratory in the search bar and the click on install.


5. After installation close this tab.

6. After that right click and go to “more” and open colaboratory. It will create a new colab notebook for you.

7. To rename your notebook:

8. Buttons to add more code cells, to add more text cells and to delete cells are as follows. It’s as simple as that.

Enabling GPU and some basic functions
To check which devices are connected to your notebook currently, run the commands mentioned below:
from tensorflow.python.client import device_lib device_lib.list_local_devices ()
Currently we only have a CPU connected to its memory.

To avail Google’s free GPU service, click on “edit” and then “notebook settings” to enable GPU. Save it as you go. It will take some time to connect (5-6 seconds).


Run the above code again. Now it will show that a GPU device is connected as well. It’s name is Tesla T4.

To install a library or a framework write the command !pip install and the name of the framework or library. Let’s try tensorflow.

Now this command might not always work, in case it doesn’t, just go to Google and write “how to install ‘library name’ on google collaboratory notebooks”. The first few searches will probably give you a single line command that you can run on your notebook to install that library on your Google collab notebooks.
To clone a github repository through your Google Drive simply just go to that repository and copy the link, come back to your notebook and write this command with your link. !wget clone “your repo link” With this your repository will be cloned in your file.

To check the content of your current folder use the command ‘!ls’. As you can see the repository has been cloned in our current directory.

Let’s now learn how to navigate to the Google Drive folders. The LS command shows you the content of your current directory. To move back one directory, this is the command that you would run.

To see the contents of your current directory use the same command “!ls”. This is what you will get.

Let’s go to the content folder with this command. cd content. Let’s see what we have inside it. It has Drive simple data and the file you imported from git just now.

Go to sample data with command cd sample_data to put some datasets in there. First go into the file and check its contents. If you want to remove something just type RM and the name of the file. To see if the file has been removed or not, type the LS command again. It should have been removed.

To see the contents of a file use this command !cat "name of file". It displays what was inside that file

Importing files or datasets into Google colab notebook
Let us now learn how to import our dataset into our Google collaboratory notebook. For that, go to Google Apps website with this link.
Copy this line of code and also import pandas library.

Run this cell**

Go back, copy this line of code, paste it in one cell and run it.
uploaded = files.upload()
Choose files and upload them, in this case it is an Expenses.csv file and try to read that file with the command shown.

To import an online dataset into your Google collaborate notebook the easiest way to do that is to write this command and add the link to it.
!wget "the link to import dataset"
Let’s add this link for example and run the cell. The name of the data set as you can see is Titanic.csv.

Now try to read it with the following command.

The data set has been successfully imported to our Google colaboratory notebook.
Before we continue, I would like to discuss a common error that arises when you’re using colab.

It means that all the GPUs that Google offers are currently busy and you can solve this problem simply by trying a few minutes later.
To see the parameters that a function of any library like tensor-flow, keras and scikit learn uses, this is how you can do it.

The documentation for that function will be shown to you which will include the parameters that the function takes as well as what each parameter means and in some cases it will also include an example of how that function can be used.

That’s all folks. Have a good time coding with Google Colab.